I want to start off first by thanking Morgan for featuring me as a guest blogger on her fabulous and informative blog! J Today I am sharing with you how to make one of my famous “RagTag Vintage Headbands” as seen in one of my two etsy shops at www.mrswaggy.etsy.com and www.mrswags80.etsy.com Albert Einstein stated "The secret to creativity is knowing how to hide your sources." I however go against the grain and think that it is better to give than to receive so this is why I will be sharing a series of some of my “how to” crafting tutorials. Let’s begin shall we?
You will need:
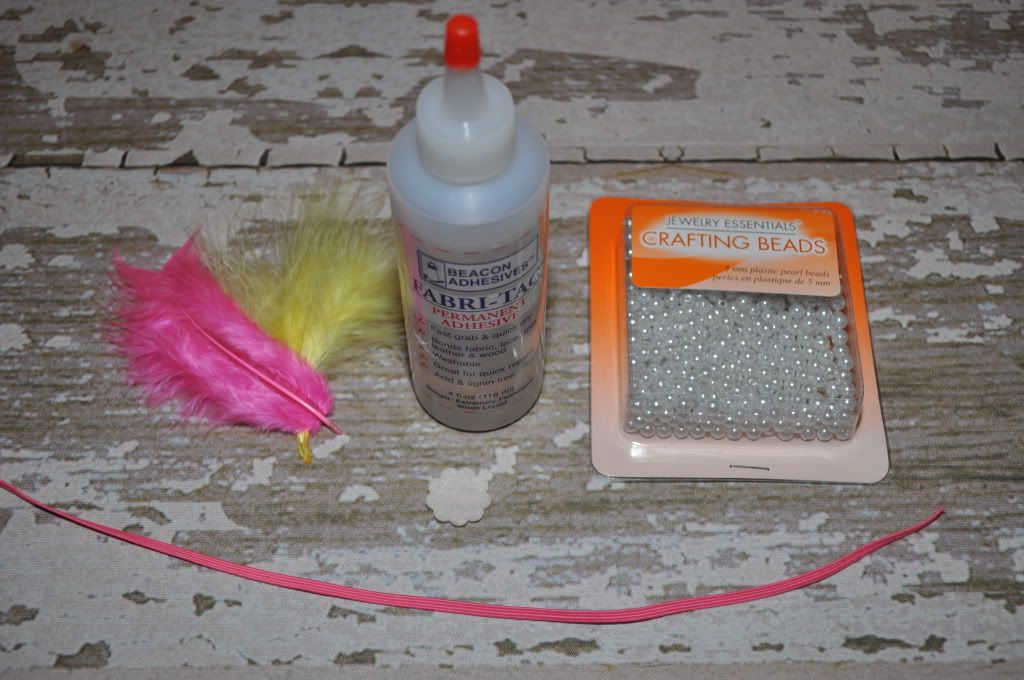
- Fabric(s) or your choice
-Fabri Tac Glue and hot glue
-Thread and needle
-Thin elastic
-Adornments i.e. Swarovski’s, feathers, etc.
-Felt
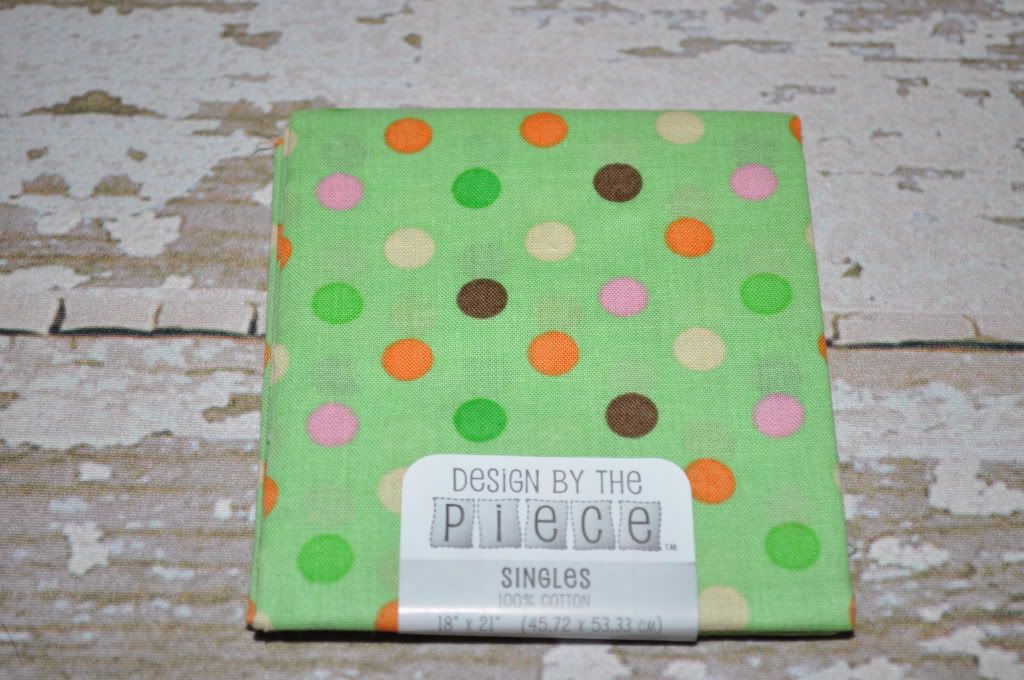
First start off with any scrap of fabric, you really do not need a whole lot of fabric but you do want a fair amount length wise as this is pertinent in making your vintage flower for your headband. I just buy the fabric quarters used for quilt making at a local Joanne’s fabric; you can even find these at Wal Mart, and Michael’s craft sections. The best thing about it is they are usually a $1.50, super affordable and so many color choices to pick from. Your fabric quarter will look similar to this:
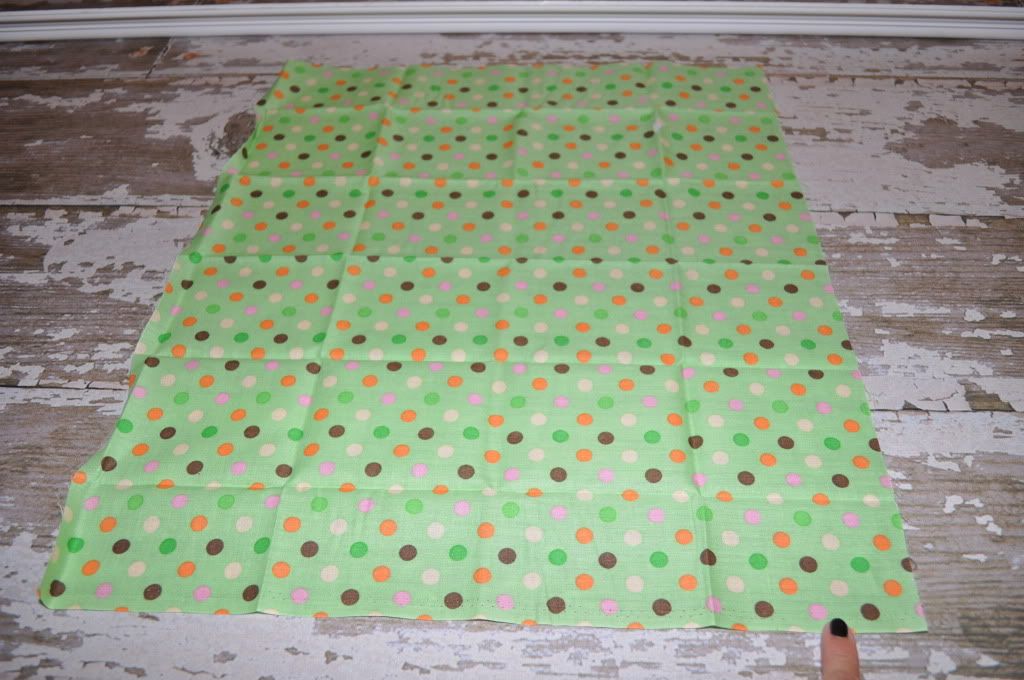
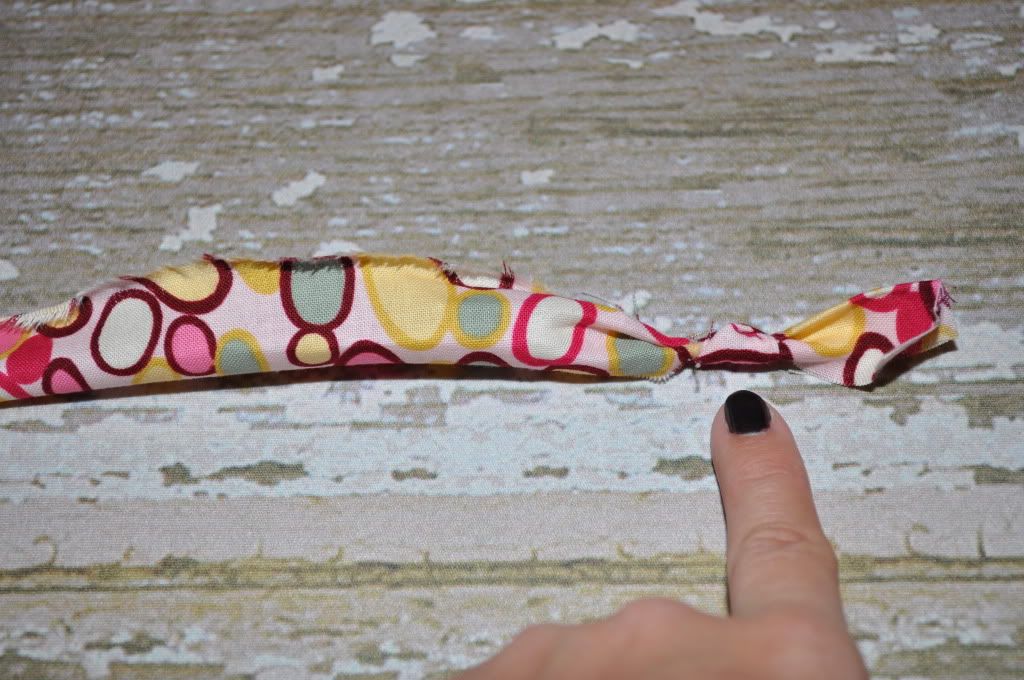
It should look like this at about 16 inches long. The ripping of the fabric provides frayed edges and gives it that extra vintage feel. The measurements I have provided are for a small to medium sized flower. However you can make the length and width according to your preference.
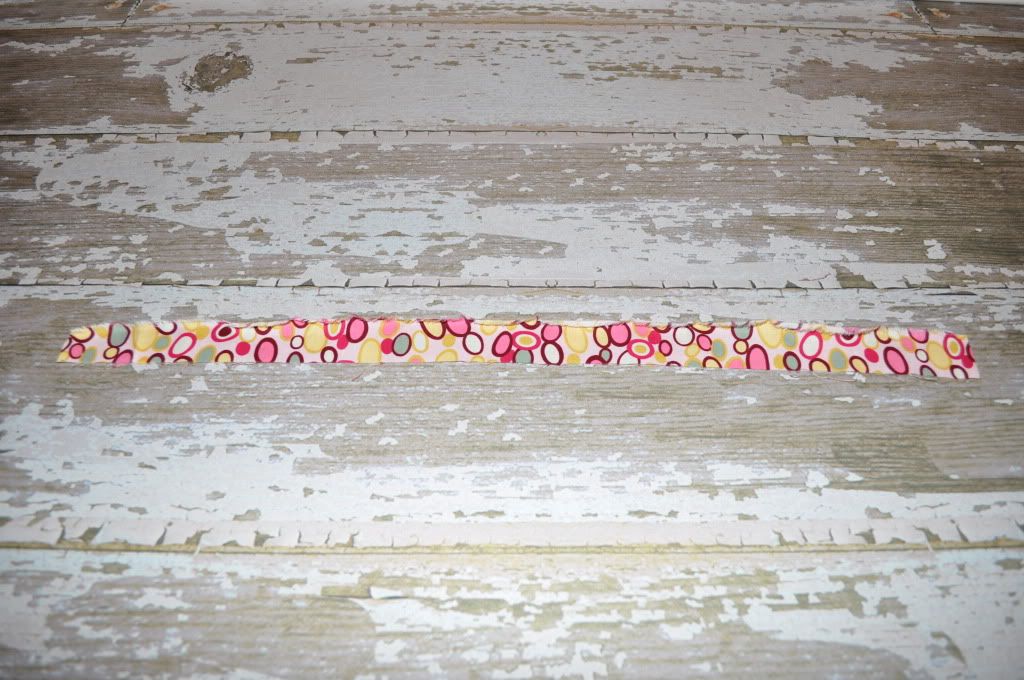
(Note I changed fabrics only because I wanted a different color) Next fold your fabric in half like so:
Then make a knot like so (make sure the right side of the fabric is facing outward. You will also notice that your know sticks upward more on one side and is more flat on the other side.I am pointing to the top side that will be the bud, the more pointier portion of the knot. Face the flatter side of your knot facing downward. Let the tail from where you made your knot hand downwards as you will be using that piece later:
Next (keeping your fabric folded in half at all times) wrap fabric around the knot. After you have wrapped the initial fabric around the knot, this makes it look more like a bud in the middle of the rosette. Like so:
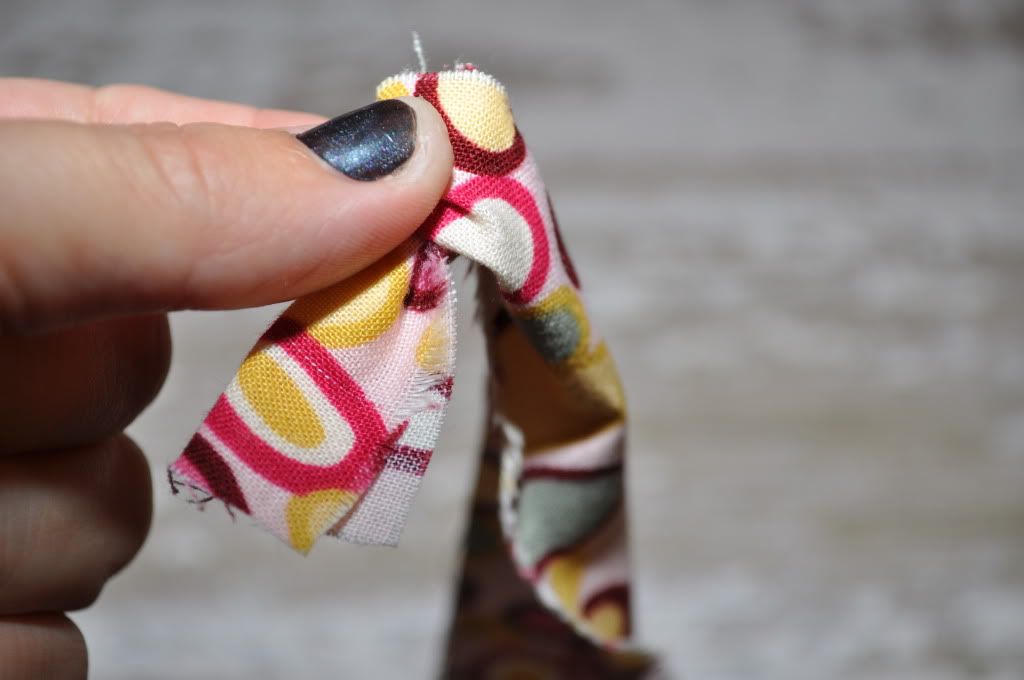
Then you will continue wrapping your fabric around the knot but you will be twisting your fabric as you go. The twist is like so (as seen below my pointer finger):
All the while make sure to keep your pointer finger at the top of your bud, and your thumb along the bottom. This helps to keep your rosette in proper placement and keeps it from wrapping to high along the top of the bud. Like so:

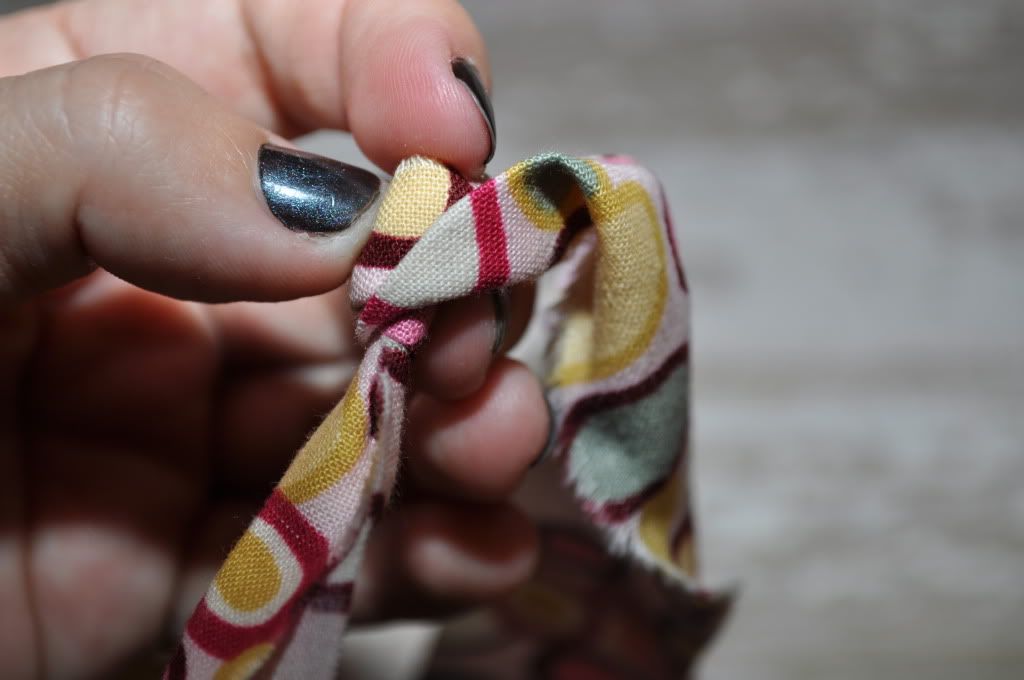
As you are twisting you will be sewing small stitches through your wrapped fabric, this ensures that the flower stays secure and tight and will not unravel once you are done and ready to place your flower on the headband. After all little girls can become rambunctious and we want to ensure their rosettes stay Tasmanian devil proof! Hang in there we are almost done! After continuing this process all the way around you will have a rosette that looks like so:

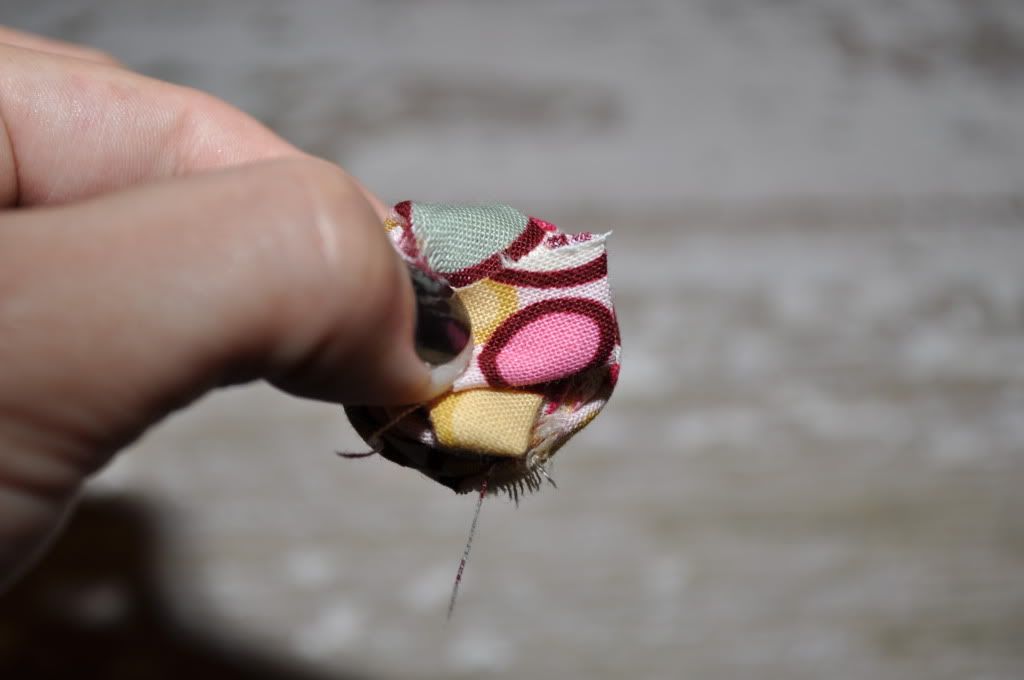
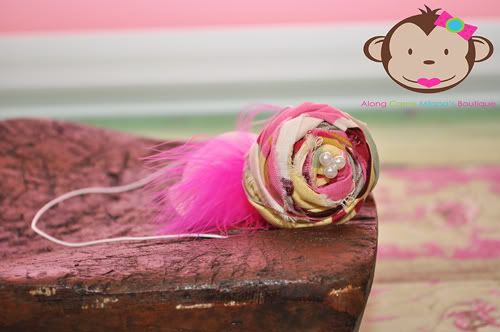
Stop wrapping when you have about a ½ an inch left of fabric, you will take this fabric tail along with the initial tail and tuck these under your flower, you can secure it with a type of fabric glue or you can stitch it in place, it is all personal preference. You can see the tails facing downward in the above picture. I try to stay as vegan as possible when I can so I stitch it. This tail provides a soft flat surface for placing the vintage rosette on the headband. Here is a picture of the bottom side of the vintage rosette with the tails tucked under.
As for the headband, I like to use 1/8 of an inch of colored elastic for my headband. You can Google basic head sizing charts for headbands. I usually like to make newborn size for my photography props so I cut 13 1/4 inch piece of elastic. Secure the ends of the elastic with fabric glue. I like to use Beacon Adhesives Fabri Tac Permanent Adhesive from Michael’s. It dries very quickly, is not stinky, and has a long lasting hold. Once my headband is dry I attach my flower by either stitching it on or using hot glue. On the underside of the headband I put a felt piece cut out into the shape I desire to provide comfort against that precious wee newborns head.

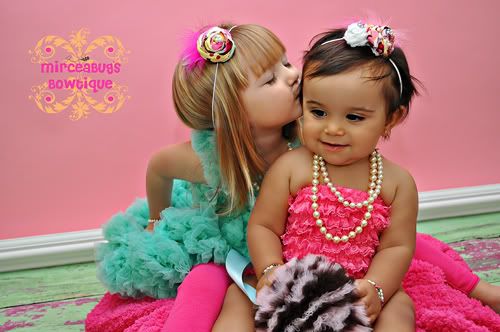
Now embellish to your hearts content! I usually buy packs of multi colored feathers from Michaels, and a box of faux pearls or Swarovski’s (also from Michael’s) and adorn my headband with these fabulous adornments. Voila! Finished project! Perfect for personal use, or photographic needs. Here is the finished product as a single rosette, or double rosette. Have fun, make it your own!

I hope that you enjoyed my tutorial please feel free to share it, I just ask that you do not take it and sell it as your own. Thank you and enjoy ;)
1 comments:
Too stinkin' cute!! Thanks for sharing!
Post a Comment